Tamagotchi Meets Flashing Guide
By Tamatinkerer
Inspired by @teallen's Smart Patching Guide And The Tamagotchi Community Who Lead Me To Exploring Tama Guts
WARNING
Doing any of this carries a risk of CAUSING PROBLEMS WITH YOUR TAMAGOTCHI (See how that warning is in caps?). I am using a Meets in this example and On's have slightly diffrent disassembly instructions. So I am not including them here, though the process is almost identical.
FOLLOW THESE INSTRUCTIONS AT YOUR OWN RISK.
DUE TO THIS PESKY THING CALLED "PERSONAL RESPONSIBILITY", ANYTHING THAT GOES WRONG IS NO ONE'S FAULT BUT YOURS!
I do this all the stinking time for fun, but I am by no means an expert, so please do not blindly follow instructions here if they do not feel right or safe. You are opening up a small electronic toy, which is not exactly dangerous, but by proceeding you are agreeing to use your own judgment and sensibilities.
That all being said, if you really don't want to risk doing this on your own for whatever reason, you can stop here. No judgment.
But if you're on the fence, and it looks like it might be fun? I BELIEVE IN YOU! Flashing your Tamagotchi Meets is a straightforward process, with a few possible bumps, but we all have to start somewhere!
| # |
Parts |
Note |
| 1 |
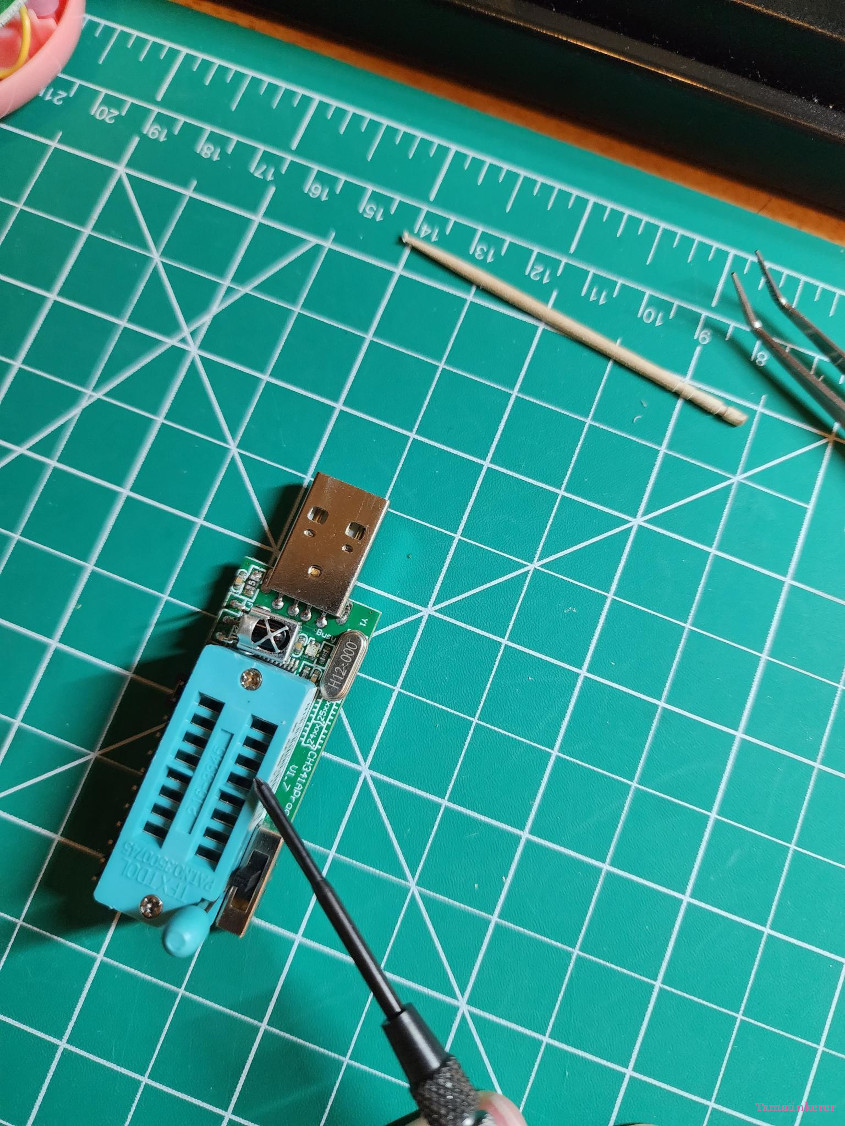
Ch341a programmer with variable voltage switch. |
The Ch341a NEEDS to be the GREEN version (1.7+) with the VOLTAGE SWITCH (1.8v, 3.3v, 5v). Using the more common black one risks frying your tama. No, the green adapter that sometimes comes with the black version won't work (it's 1.8v). |
| 2 |
JIS #00 Screwdriver. |
Philips #0 might work as well. Pick the one that sits snugly and doesn't skip when turning. Do not strip your screws. |
| 3 |
Tweezers or a thin wedge. |
You'll need something to lift the tape inside just enough to access the screws. |
| 4 |
Chip clip with adapter board. |
You want an 8 pin adapter board (8 pins on both sides of the board, one set of 8 (4x2) plugs into the programmer, the other, the plug end of your chip clip. The clip end will have 4 bottom 'teeth' and 4 upper 'teeth'. This chomps onto the legs of the onboard chip you're going to flash. Be SURE to use a clip that is aligned properly (The teeth align). It won't hurt your tamagotchi if you don't, but it will make the whole process a headache if the clip is out of alignment by even a few millimeters. |
| 5 |
Programming software and drivers for the programmer. |
NeoProgrammer (version 2.2.0.10 at the time of this guide being made) works well for this, and provided you have installed your Ch341a (Green) programmer drivers right (Google all these things as links change and perish), NeoProgrammer should recognize the USB programmer when plugged in. |
| 6 |
Firmware files for the version you want to flash your Meets too. |
Check The Internet Archive for On/Meets firmware files. |
| 7 |
Hone your Google-Fu! |
Ask for help with terms before asking for help with what you are doing! Knowing the right words and terms can open many doors with the power of the internet, so try and avoid getting a dumbed down answer unless you're at your limit! |
| 8 |
Read Every Step Before Starting |
Do Not Start Without Reading This Entire Guide. Finish this whole guide, then make your first attempt. If something goes wrong, you can probably fix it by attempting to flash the tamagotchi again unless you, I don't know, used the black version, fried your egg, and now your toasty Meets won't power on anymore. That's on you. |
I won't be going super in depth on how to use NeoProgrammer or AsProgramer, the first being a fork of the second. So I'm just going to tell you what to do in NeoProgrammer. However once you know the layout and understand what the general process is, it's actually very intuitive.
***If you want to change out your face plate with a custom one, this would be a great opportunity to do that! So have it ready before you start if you want to.***
Software Setup
Google should find you a reliable download of NeoProgrammer as well as the Ch341a drivers you need, they are usually bundled. Once that is done, start Neo and go to Hardware.
You should find your USB programmer listed as **Ch341 Green**. Select it.
If you have everything set up correctly, the Neo will have no problem recognizing the Ch341a Green USB programmer and inform you it is plugged in and ready to be used.
Be sure the switch on your USB programmer is switched to 3.3v, and plug it in within reach of your workspace.

Here is the '1' socket on your programmer. When instructed to plug in the clip later, the plug being pointed to will align with the red cable on the clip.
Time to be sure your workspace is prepared. In this case a good work space will have: A safe place to put the screws and other bits you'll be pulling out and off of your tama, your tools in easy reach, and a flashlight (a cell phone will do) for when you inevitably drop a screw. Remeber, those little blighters can teleport AND fly.
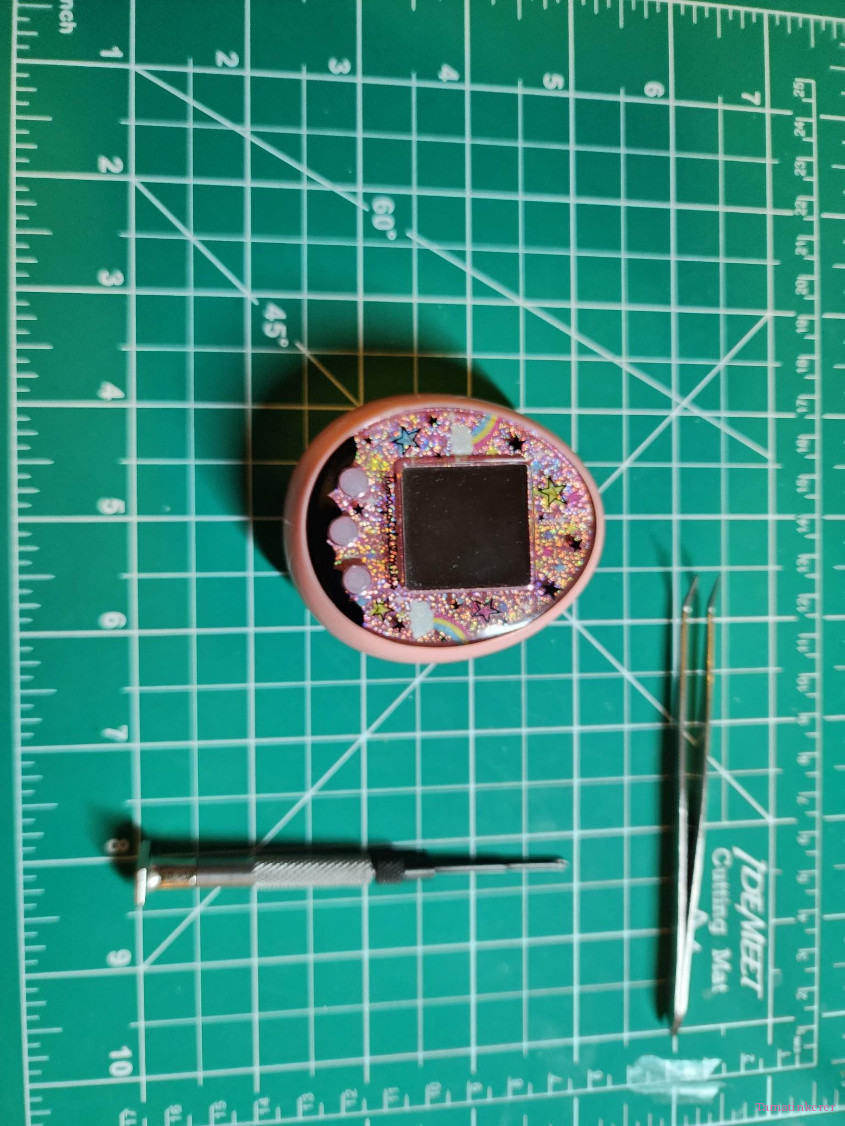
Crack Open That Egg! (Not Literally!)
Before you start, be absolutly sure your space and tools are ready! (Preferably, right next to your programmer and a free USB port to plug it into.)
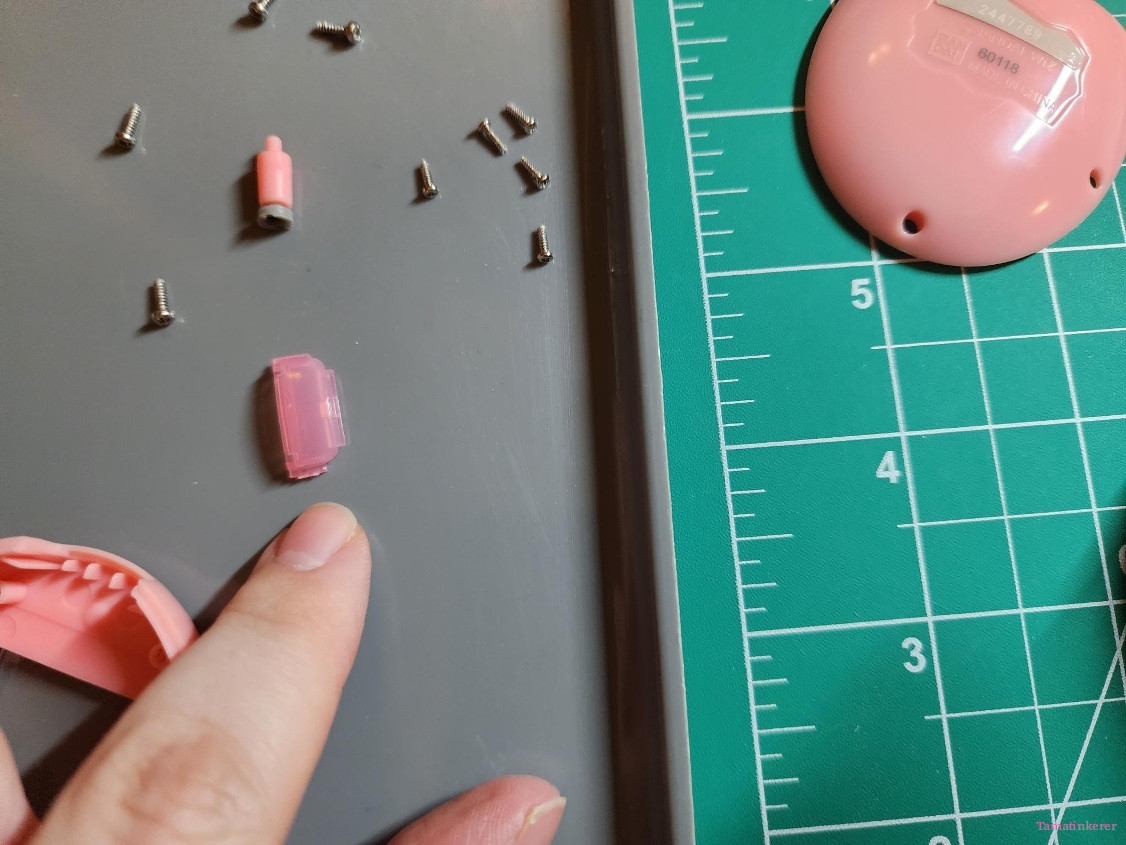
A place for all the screws, the receiver cover, and the reset button.

Remove the back battery plate and set it aside. Under the plate on either side of the battery compartment you'll see a total of 4 screws. Remove them and carefully set them aside
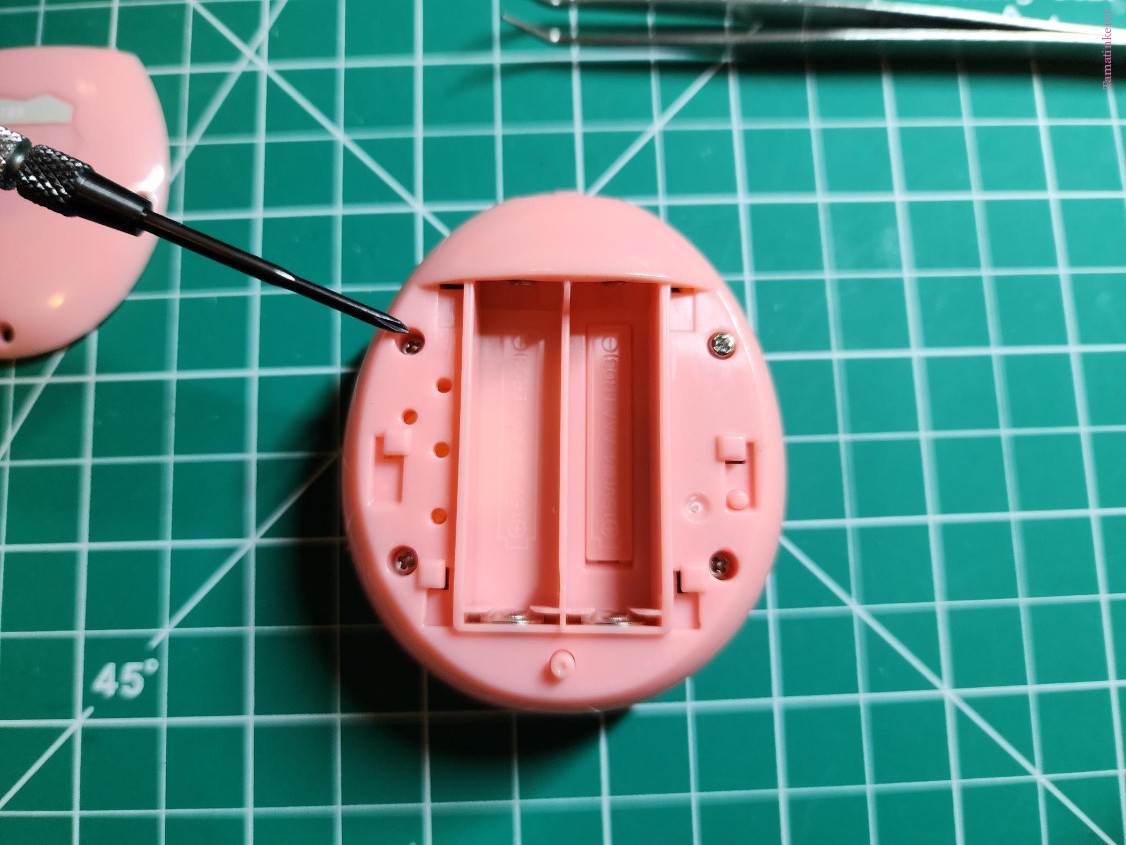
DO NOT PULL OFF THE BACK COVER!
The battery and speaker are soldered into the back half of the shell, and if you pull any wires loose, you'll have to solder them back in if you want to play with your tama ever again.
Gently seperate the two halves of the shell and open it pulling towards the left. The wires form a fragile hinge, so handle said hinge with care. At this point the rest button (two parts, one mayching your tama's shell, the other a simple gray dot of rubber) will fall out. Find that little devil and put it with your screws.
Do Not Lose The Reset Button
You're In! Sorta!
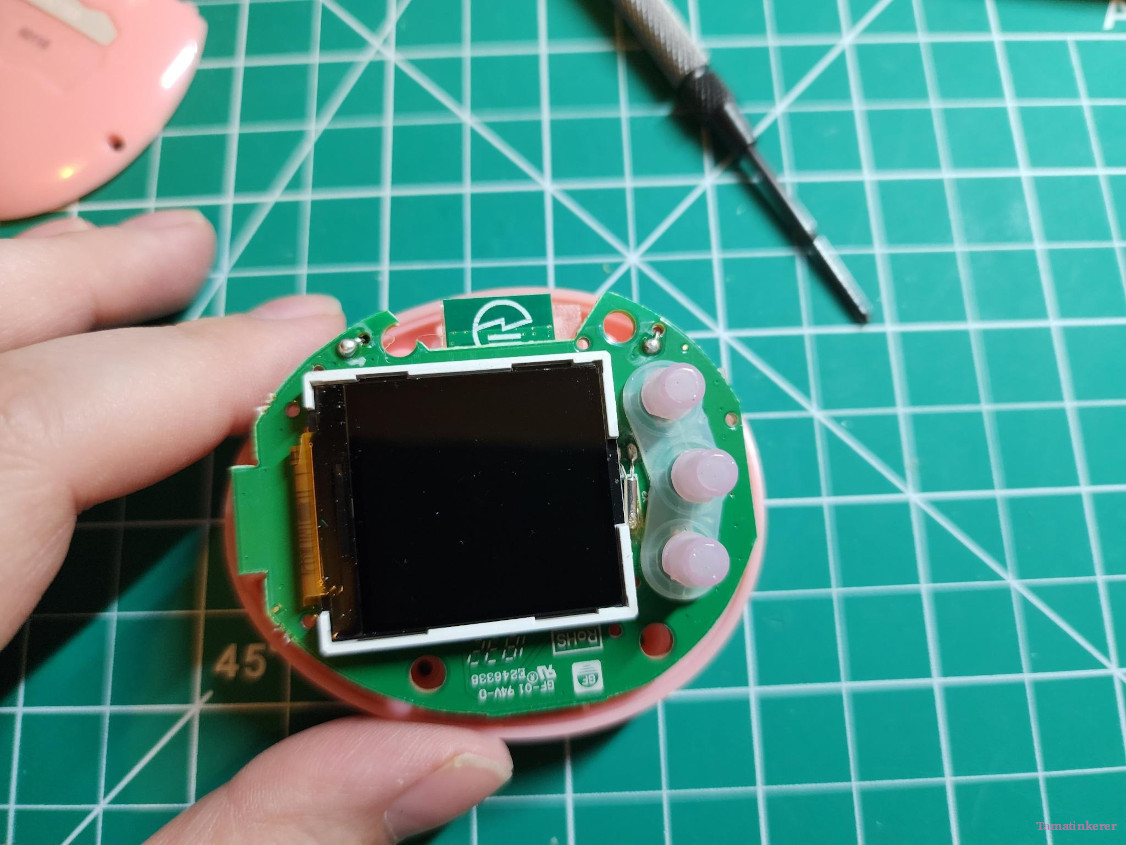
There are five more screws on the board that need to be removed. You can also see the reset button (tall pink post with the tiny pin head top). Set that aside if you haven't yet.
You can see them cirlced in the picture below. Three are under tape. DO NOT take off the tape or anything like that, we're just going to lift the edges up enough to acess the screw below it.
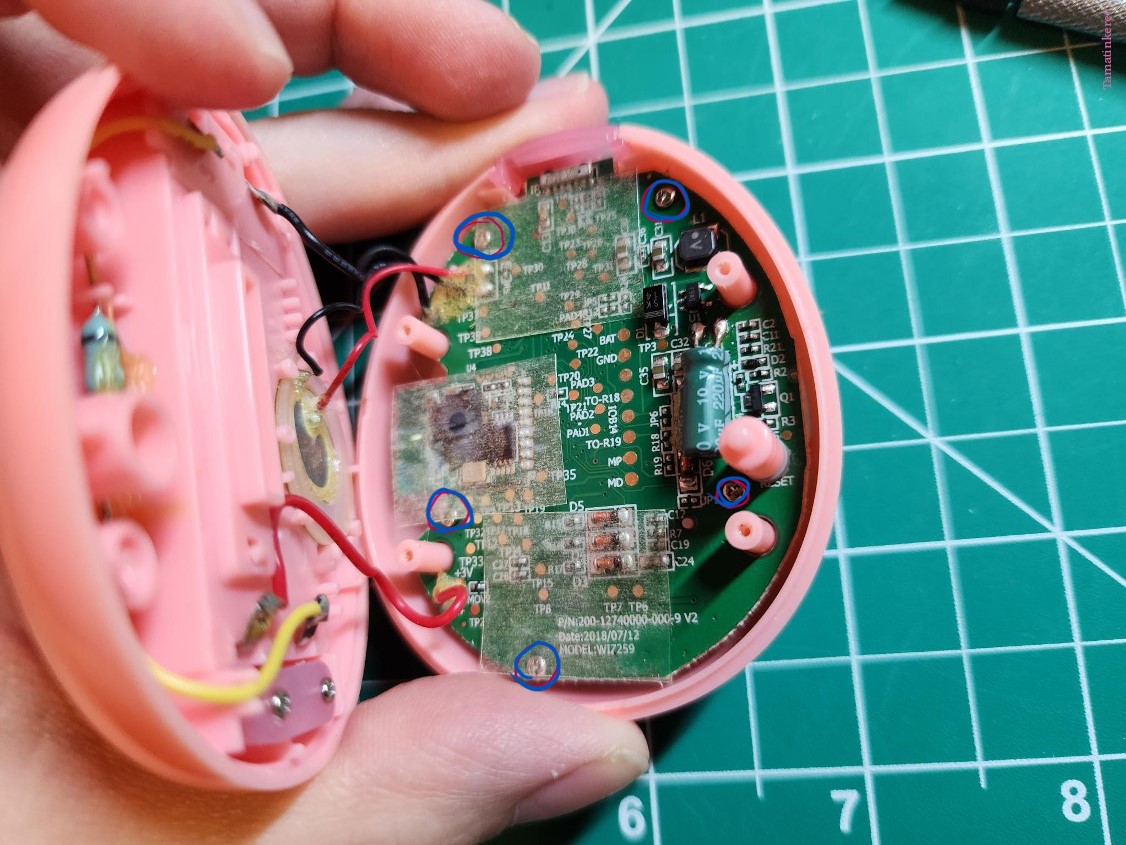
Use the tweezers or guitar pick or whatever you chose as your gentle wedge of choice and life up the edge of the tape closet to the screw and undo them. I use tweezers because they make removing and replacing the screws a breeze.
A picture was attmepted, but alas, I have no helpers and only two hands.
After all the screws are out, turn the whole tamagotchi over so it's on it back. Then, gently lift the front half of the shell off the back half. It may take a bit of wiggling, so be gentle, as the top as reciver cover sometimes needs to be removed first.
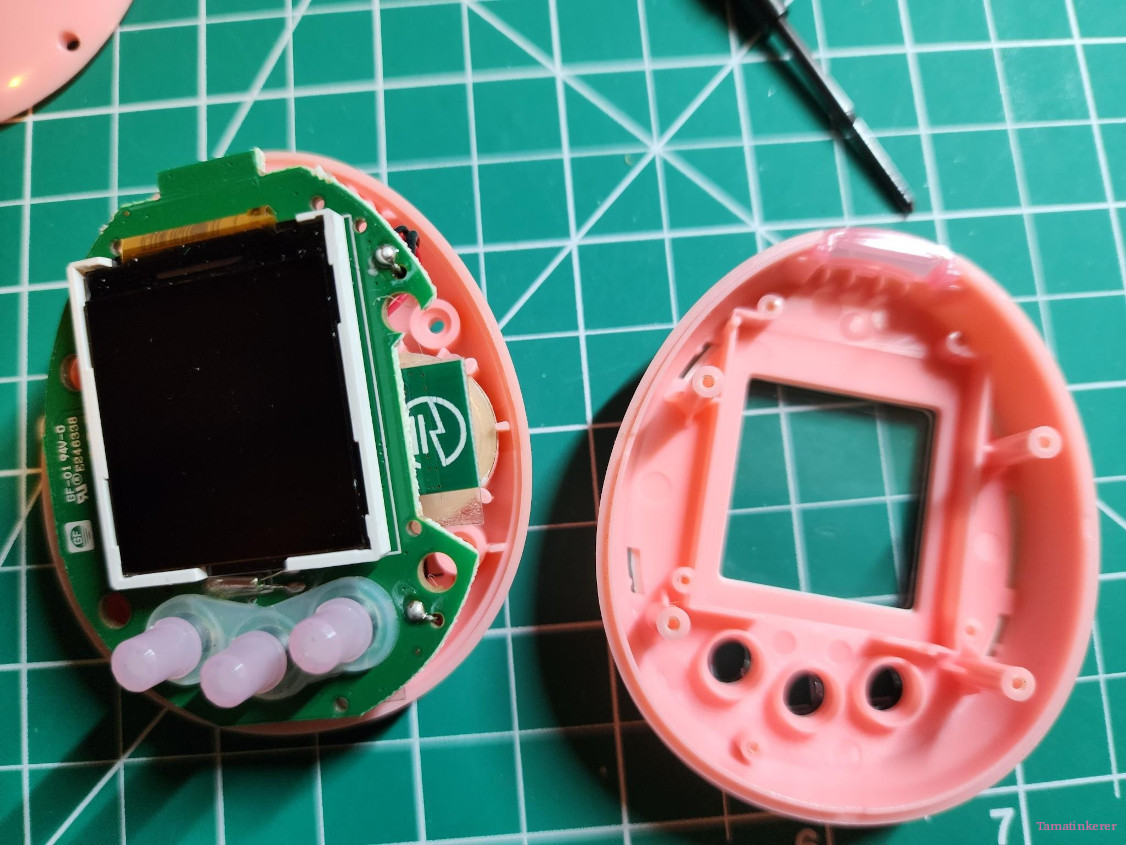
The board should come lose easily, but be aware of the receiver cover. It may or may not keep the board in place so it's best to gently pull it out of it's little slot at the first hint of resistance. Set it with your other parts.
If you wanna change out your face plate, now would be a great time to do so!
We're In! For Realsies This Time!
The chip to be flashed is right under the LCD. Do Not Touch any of the black parts with your fingers. Seriously, touch this screen as little as possible.
What if you do?
I GET it.
Man. Do I get it.
Just use a lint-free, perfectly clean microfiber lens cloth or dry disposable lens wipe, to gently remove any smudgy prints it ended up with.
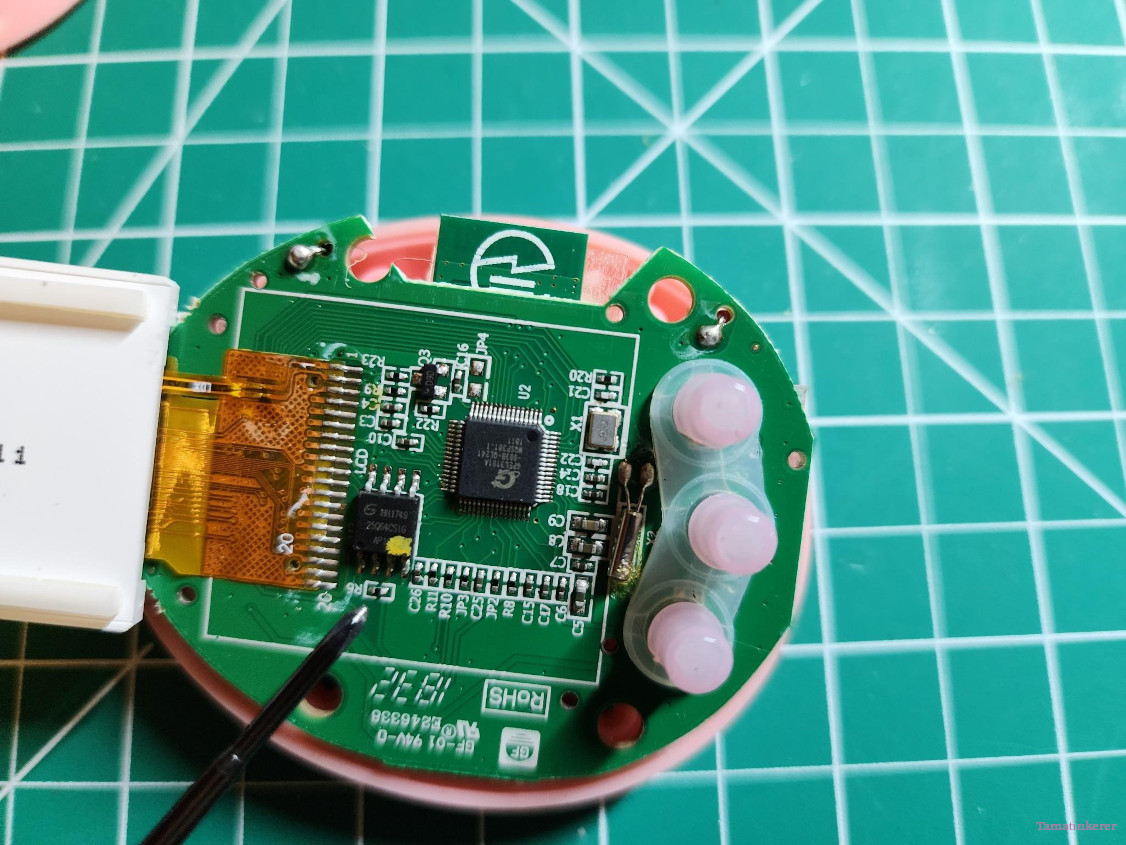
Now, gently flip the screen over like it's another fragile little hinge. Just letting it hang for a short while won't cause any issues or problem. At least not more then requiring it to be held it in place, which is more likly to exert pressure or force in a deleterious fashion vs the weight of screen itself. (Warning: That May Be A Controversial Opinion. Obligitory 'I Am Not An Expert'.)
It's Chomping Time!
Now it's time to bite the spider! Making sure the red cable on the chip clip will be aligned with pink dot on the last pin on the side nearest the screwdriver head.
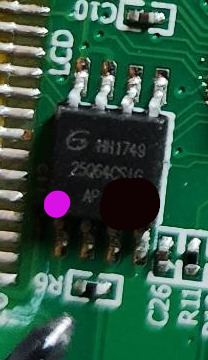
Below is a picture of the generic chip clip you'll need, and what it looks like when plugged in the nessesary adapter for the programer. Make sure the red cable on the chip clip will be aligned with the pink dot in the picture when placed on.

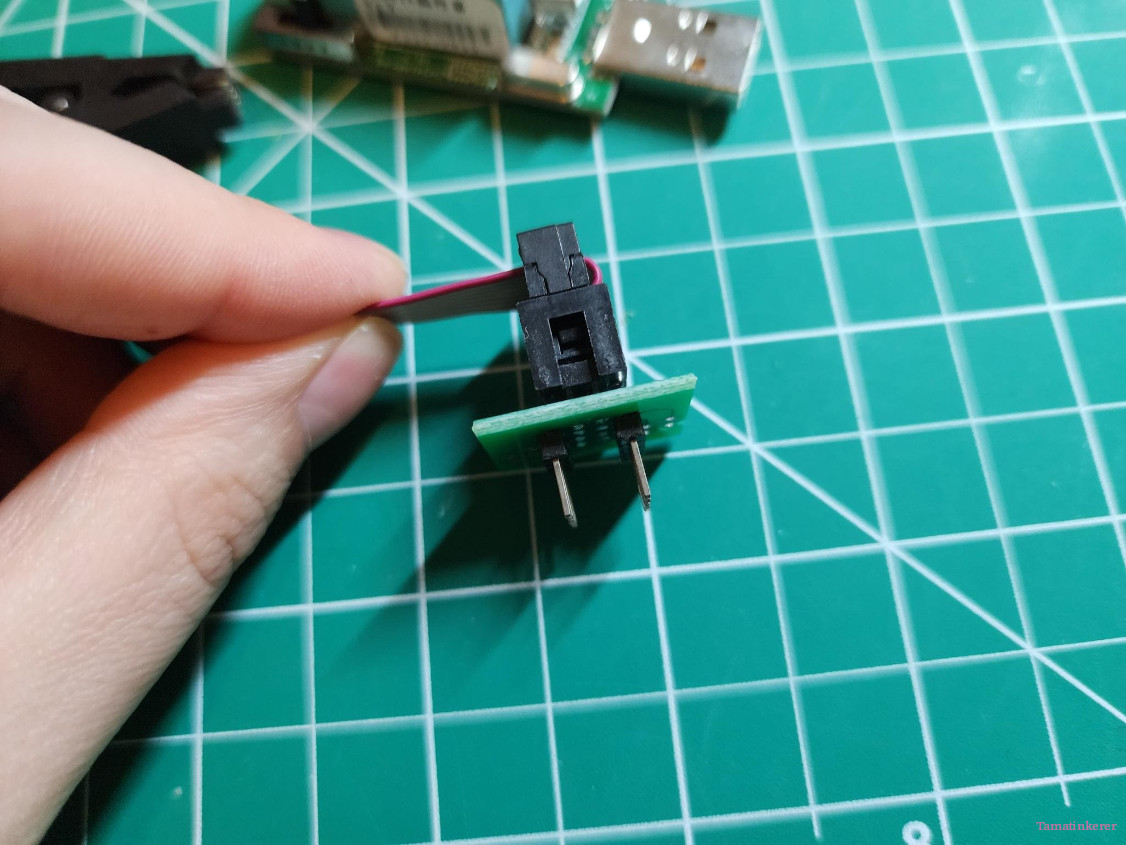
It's a fairly straightforward process, but to clarify the mouth of the clip that's clamping down should be next to flush with the board and all point need to be making contact on those 8 little spider legs.

Your tamagotchi may seem to power on for a second, but don't worry, you didn't fry it*. As long as you're using the correct switch position (3.3v) and usb programmer *(Green v1.7+ Ch341a).
It's Time to Get With The Program(ming!)
NeoProgrammer should be open at this point. I won't include visuals for this because confession; I forgot and don't use the software routinly, so I couldn't just grab the screen shots later. Sorry my dudes.
| # |
Step |
Notes |
| 1 |
Make sure the programmer is recognized by NeoProgrammer |
If it is not recognized go back and reinstall your drivers before going any further. |
| 2 |
Find the button that says Detect IC and click it. It should tell you it succeeded after a good solid minute. If it's immediate, something went wrong. You have to fix the problem to proceed. |
'Detect IC' looks like the NeoProgrammer icon with a little '?' on top of it. If nothing happens you have to mess around with your clip's positioning, or reinstall your drivers. You may also have to reseat the adapter and the clip, and there is a slight chance that your Green Ch341a is glitchy. I have three. One is reliable. If you enjoy this project and start seeking out more tamas to play with in this vein, I recommend investing in a t48 or similar. |
| 3 |
Now, if everything is working as it should, you can click the Read IC. It will take a while to read the chip, and hopefully will identify it as GD25Q64x or something close to that. When it finishes hit Verify IC. |
If the read shows up as a wall of 'FFFF' or '0000' you have a bad connection. Adjust your clip and repeat the step. The 'Read' icon has an arrow pointing left. The Verify Icon has the '=' sign. |
| 4 |
If you hit Verify and everything under Main Memory reads like gobbledygook, then congratulations, you have a solid connection and have read the chip! Save the dump file as a backup in case anything goes wrong by hitting the floppy icon. |
Save the file as a .bin |
| 5 |
Have your desired firmware ready, because now it's time to flash it! Click Erase and wait for the program to finish. |
'Erase' is the icon with the big red X on it. Yes, I probably should have made this a video. |
| 6 |
Click the Folder icon and find the firmware file you want to use. Once selected you're going to click on the little arrow beside the Write icon. You want to be sure everything in that drop down is checked, and then click Write |
Your firmware will be a '.bin' file. The default 'Write' setting may have changed since I last used this software, but this is just saving time and a possible headache by making sure everything will happen as it should. |
| 7 |
Do Not Touch anything until the process is finished. |
This 'No Touching' includes, but it not limited to, the clip, the tamagotchi, the USB programmer, the PC's power button and so on and so forth. |
| 8 |
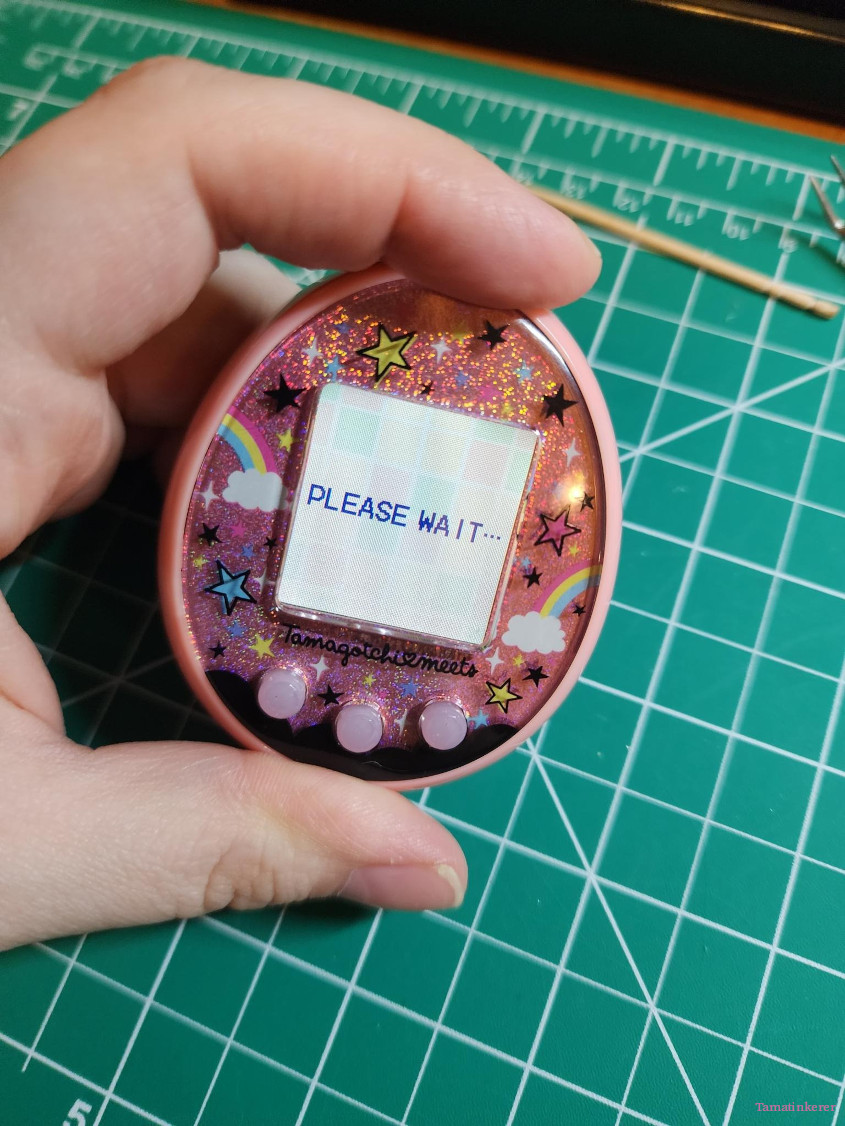
Once this process is done hit the Verify IC. If nothing errors out and you don't end up with a wall of 'F' or '0' then you have successfully flashed your tamagotchi to a new version. |
If verification fails, adjust the clip, try and do the 'read --> verify' dance for a while until it works again, the clip likely got shifted somehow. |
| 9 |
You can now remove the clip and begin putting your tamagotchi back together. |
Be mindful of all the parts, and don't forget the reset button! |
All Done! See 'Troubleshooting' below if this isn't your result
Troubleshooting!
Gonna be honest here. Be prepared to pull your tama apart again if something was left out/it won't boot. If it does boot but to a blank screen try and reflash it.
| Problem |
Solution |
Notes |
| No Power |
Check that everything was put back together properly and ALL the wires are still firmly soldered in place. |
If you have no power at all, you may have dislodged a battery connection. You'll need to solder it to repair it if you find a loose wire. Check the Reset button was put back properly. |
| Power, White Screen |
You need to try re-flashing the tamagotchi. |
It may have just been a bad .bin file, but worst come to worst, you made a backup for a reason! |
| No sound |
See 'No Power' |
See 'No Power', but it's 'Sound' now. Your speaker is in the back shell half and may have suffered a similar fate. |
| '4' |
If none of the following are what's plauging you, you can message me Instagram under this username, I might be able to help, but only as a favor and this isn't hired work, and there is no warrenty, blah blah blah. Don't make me regret trying to help, and we good. |
Caviot, your problem may become number '4' of this unnumbered list. |
I own nothing! I mean, I do own the pictures, but use them wherever. IDGAF.
Edited 10/12/2023: I can't spell worth a damn and live a life without spell check for the adrenalin rush.
I made this, so I can tots plug on it right? Check out my Etsy for finshed converted/repaired tamagotchi and my Kofi.